Husky Asphalt Paving

Posts

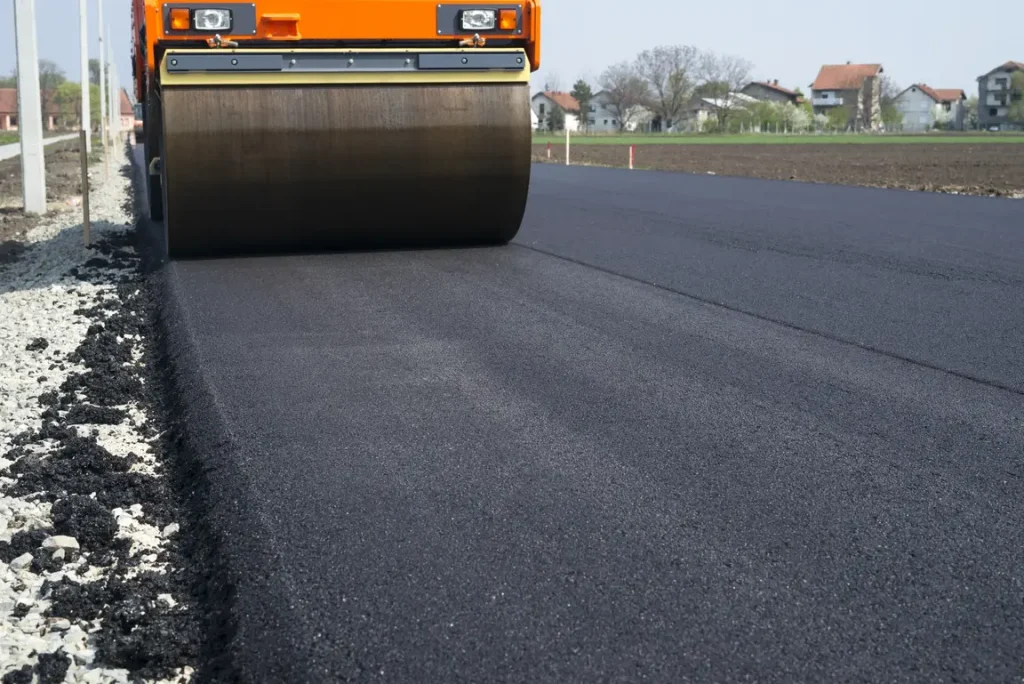
Road construction equipment rolling asphalt on a newly paved road, showcasing the paving process relevant to asphalt services in Orange County.

How Sealcoating Protects Asphalt and Prolongs Pavement Life

Road Construction Services in Orange County: Process, Materials, and Standards What Road Construction Services Include in Orange County Road construction services in Orange County cover a lot more ground than most people realize. At the core, you’re looking at site preparation, grading, base installation, asphalt or concrete paving, drainage planning, striping, and ongoing maintenance for residential, commercial, and municipal roads. That’s the short version. The longer version is that a road construction company in Orange County might be building a private road through a gated community one month and bidding on a municipal contract the next. The range of project types is wider than most people expect: Private roads serving gated communities and estates Commercial developments requiring dedicated access infrastructure Residential subdivisions built to municipal acceptance standards Industrial access roads engineered for heavy equipment loads Municipal contracts covering city streets and public right-of-way improvements Each project type is its own world, with its own permit requirements, engineering standards, and material decisions. Planning and Permits for Road Construction Projects This part of the process doesn’t get talked about much, but it sets the tone for everything that follows. Before a single piece of equipment shows up, road projects in Orange County move through city or county approval processes that vary depending on jurisdiction. Anaheim, Irvine, Santa Ana, Yorba Linda, they each have their own requirements, and knowing how to navigate those offices matters. Several things have to happen before grading can begin: Engineering plans get submitted and approved Soil testing establishes bearing capacity and identifies unstable subgrade conditions Utility coordination locates and protects underground gas, water, electrical, and telecom infrastructure Environmental review is completed where required near drainage areas or sensitive habitat Contractors who understand Orange County’s regulatory environment keep projects moving. Those who don’t tend to create expensive delays that nobody budgeted for. Site Preparation and Grading Process Site prep is unglamorous work. It’s also the work that determines whether a road holds up for twenty years or starts showing problems in five. It starts with clearing. Vegetation gets removed, topsoil gets stripped, and anything organic that would compress under load gets hauled off. Old pavement or structures come out during demolition. Then excavation begins, cutting and filling to establish the road’s designed elevation and cross section. Where soft or unstable soils turn up, and in parts of Orange County, they do, stabilization becomes necessary. Sometimes that means lime treatment. Sometimes it means pulling out bad material entirely and replacing it. Geotextile fabric gets used when conditions call for it. Compaction follows, done in lifts with vibratory rollers, and verified with density testing before moving on. Cross slope gets engineered into the graded surface at this stage. That one to two percent pitch isn’t an afterthought. It’s what moves water off the road surface before it can work its way into the base. Get that wrong during grading and you’ll be dealing with the consequences for the life of the road. Base Layers and Structural Foundation Standards The base layer is where road construction either earns its money or cuts corners. Class II aggregate base is California’s standard, and depth requirements vary significantly by use: Light residential roads: 4 to 6 inches of aggregate base Commercial and mixed use roads: 6 to 8 inches depending on traffic volume Heavy truck routes and industrial access roads: 12 inches or more Every lift gets compacted to at least ninety five percent relative compaction, confirmed by testing. There’s no shortcut here. Under compacted base is the most common reason roads fail ahead of schedule, and it doesn’t announce itself until the damage is already done. Load bearing design has to account for actual use. A road serving a distribution warehouse isn’t engineered the same way as a neighborhood street. And the subgrade beneath the aggregate base has to meet its own compaction standard, because a well built base sitting on weak material will still fail. Spending more on base work upfront saves a lot of money down the road. That’s not a figure of speech. Asphalt vs. Concrete Road Construction in Orange County This comes up on almost every project, and the honest answer is that it depends. Asphalt Asphalt paving costs significantly less upfront, typically thirty to forty percent below concrete, though material prices shift. Installation is faster, roads can usually open within a day or two of paving. Repairs are relatively straightforward to patch or resurface without a major production. Commercial asphalt paving performs well in Orange County’s climate. The summers are hot, UV exposure is real, and oxidation does accelerate over time, which is exactly why sealcoating on a regular schedule isn’t optional, it’s part of the math. Asphalt also handles minor subgrade movement better than concrete, which works in its favor on projects where ground conditions aren’t perfect. Concrete Concrete lasts longer without maintenance intervention and handles heavy axle loads without rutting. Over a thirty year window, lifecycle costs can favor concrete. But the upfront number is substantially higher, and repairs when they’re needed are more involved and more expensive. For most roads in Orange County, private, commercial, and municipal, asphalt wins on cost efficiency and available contractor expertise. Concrete shows up on industrial sites, port access roads, and projects where long term maintenance funding is locked in from the start. Drainage and Water Management in Road Construction California takes stormwater management seriously, and road construction projects are expected to address drainage thoroughly, not as a checkbox but as a core design element. Curbs and gutters direct runoff to planned collection points. Catch basins and storm drains handle design storm volumes without flooding the road surface. Culverts carry drainage under road crossings and have to be sized correctly or they become a washout risk. Roads in hillside areas of Orange County, Anaheim Hills, Yorba Linda, portions of Mission Viejo, face more complex drainage challenges than flat terrain. Cross slope, crown design, and superelevation on curves all work together to keep water moving at a controlled rate. Protecting asphalt

Road Construction Services in Orange County: Process, Materials, and Standards Read More »
Complete Guide to Asphalt Driveway and Parking Lot Paving in Orange County

Complete Guide to Asphalt Driveway and Parking Lot Paving in Orange County Living in Orange County means sunshine pretty much all year. Sounds great until you realize what that constant heat does to your pavement. Driveways fade. Parking lots crack. And if the original installation wasn’t done right, you end up with problems way sooner than you should. We’ve seen a lot of growth around here lately. New homes going up in Irvine, businesses expanding toward Tustin and beyond. More people means more cars, more delivery trucks, and a whole lot more wear on every paved surface in the county. Getting your asphalt done properly isn’t just about looks. It’s about protecting something you’ll rely on every single day. What Actually Happens During Paving Most people don’t think about what goes into paving until they need it done. Understanding the basics helps you know what to expect. If you’re wondering what driveway installation actually involves, the process is pretty straightforward once you break it down. It starts with prep work. The crew clears out whatever’s there, levels the ground, and makes sure the soil underneath won’t cause problems later. This part takes time but rushing through it is one of the biggest mistakes a contractor can make. Then comes the base layer, usually crushed rock or gravel packed down tight. If there are loose spots in the base, the asphalt on top will eventually sink or crack. You won’t notice right away but give it a year or two and the problems show up. Once the base is solid, hot asphalt goes down and heavy rollers compact it into a smooth finish. Some projects need multiple layers depending on traffic demands. A residential driveway might only need a couple inches. A busy parking lot requires quite a bit more. Working with an experienced paving contractor in Orange County ensures each step gets done correctly. Driveways for Orange County Homes Your driveway doesn’t take the beating a commercial lot does, but it still needs to be built right. You’ve got your daily drivers, maybe a truck, possibly kids riding bikes on it. When thinking about driveway paving in Orange County, thickness matters. Most residential driveways work well with two or three inches of asphalt on a compacted base. That’s plenty for regular family use. If you live in a neighborhood with an HOA, check the rules before starting. Some associations get specific about materials and approved contractors. Better to know upfront than deal with headaches later. And a nice driveway just makes your whole house look better. That fresh black surface with clean edges changes the vibe of the place. If you ever plan to sell, buyers notice stuff like that immediately. Budget wise, asphalt remains one of the best deals out there. It gives you a solid surface that’ll last 15 or even 20 years with proper care. Parking Lot Requirements Commercial parking lots deal with stuff that would destroy a regular driveway quickly. Delivery trucks every morning. Hundreds of cars throughout the day. This requires a different approach. For asphalt paving in Orange County on commercial properties, the base goes deeper. We’re talking eight inches or more of compacted material. The asphalt layer itself usually runs around four inches depending on vehicle types using the lot. Water destroys parking lots faster than anything else. Good design means grading so water runs toward drains and away from pavement. After curing, striping needs to happen. Parking spaces, fire lanes, handicap spots that meet ADA requirements. This isn’t where you cut corners. What Commercial Property Owners Should Know Running a business while your parking lot gets torn up is stressful. Every day the lot is closed means potential lost customers. That’s why commercial asphalt paving in Orange County usually happens in sections. A good contractor keeps part of the lot open while paving another area. Takes longer but your business keeps running. Before the project starts, talk to your contractor about maintenance planning. When should you schedule inspections? How often does sealing need to happen? Getting ahead of small issues keeps them from becoming expensive problems. How Orange County Weather Affects Pavement Our weather is mild compared to places with snow, but it still impacts asphalt in ways you might not expect. Warm days cause asphalt to expand. Then it cools at night and contracts. This happens constantly and eventually leads to cracks if the asphalt wasn’t installed with our climate in mind. The sun breaks down the binder holding asphalt together. Over time the surface gets brittle and turns grayish. That’s more than cosmetic. Once the binder starts failing, everything else goes downhill. Properties near the coast deal with salt air that speeds up aging. Traffic patterns also vary across the county. A quiet street in San Clemente sees totally different use than a shopping center off the 405. Your paving specs should match actual daily demands. Parts of Orange County have clay soil that expands when wet and shrinks when dry. That movement pushes against pavement from underneath. Any decent contractor checks soil conditions during planning. Keeping Your Asphalt in Good Shape Even perfect installations need attention over time. The biggest thing you can do is keep up with sealcoating in Orange County. Every two or three years, fresh sealcoat protects from water and UV damage while bringing back that rich black color. Cracks will happen eventually. What matters is dealing with them before they spread. A small crack today becomes a network next year, then water gets into the base and suddenly you’re looking at potholes. Small repairs done early save huge amounts later. Sometimes the surface wears out but the base underneath remains solid. Resurfacing makes sense then. The contractor applies new asphalt over what’s there. Costs less than starting over and adds another decade to the pavement’s life. When things get really bad, asphalt repair in Orange County addresses potholes and crumbling edges. Patching problem areas keeps surfaces safe until you’re ready for bigger projects. Finding

Complete Guide to Asphalt Driveway and Parking Lot Paving in Orange County Read More »

Understanding the Sealcoating Process: What to Expect

Understanding the Sealcoating Process: What to Expect

Sealcoating is a vital maintenance process that protects asphalt surfaces against the elements and wear. Asphalt sealcoating creates a protective barrier between the pavement and damaging agents such as water, ultraviolet radiation, chemicals, and general wear and tear. This comprehensive guide is designed for homeowners, commercial property managers, and paving service providers who seek to understand every step—from the chemical composition of sealcoat formulations to the professional methods employed during application. By applying a high-quality sealer, one not only extends the lifespan of asphalt pavement but also enhances its appearance while protecting it from oxidation, potholes, and erosion. The process involves specialized equipment and strict adherence to safety measures, ensuring that both the user and the environment are safeguarded. Through recent studies and industry research, it has been highlighted that proper sealcoating can reduce pavement deterioration by up to 40% over its lifetime, thereby justifying the investment in periodic maintenance. Experts have cited peer-reviewed research confirming that the right mixture of sealants and proper application techniques improve adhesion, waterproofing, and resistance to UV damage significantly. Moreover, innovative mobile apps and applicant tracking systems used in scheduling such services have streamlined the entire process—from initial inquiry to post-application care—providing clients with a seamless experience. As this article unfolds, it will delve into how sealcoating works to shield pavement, what steps are involved in the process, the value of professional application, what to expect prior to the work being carried out, how the application unfolds, and how post-application care should be managed. This detailed explanation will ensure that you are well-prepared whether you are planning to seal your driveway, asphalt parking lot, or any commercial pavement surface, and will help you understand the critical factors such as mixture formulation, environmental impact, safety standards, and future maintenance planning. Decoding How Sealcoating Works to Shield Pavement Sealcoating works by forming a protective film over asphalt surfaces that mitigates the effects of weathering, oxidation, and abrasive forces. The mechanism is based on a chemical process where the sealant adheres to the surface, filling in small cracks and pores, thereby preventing water penetration and premature deterioration. The protective barrier function of sealants is critical in reducing water damage, which is one of the primary causes of pavement failure. By blocking moisture, the sealcoat also prevents the freeze-thaw cycles that lead to potholes and cracks. The Protective Barrier Function of Sealants Sealants form a continuous film over the pavement that repels water and harmful chemicals. This barrier minimizes penetration of salts, oils, and other corrosive substances that can degrade asphalt. The effectiveness of this layer is evident from studies that show a substantial reduction in oxidation rates once the sealcoat is applied. The functional properties of the barrier include improved resistance to UV radiation and enhanced longevity against heavy traffic loads. Ingredients in Sealcoat and Their Roles The chemistry of sealcoating involves a complex mixture of resins, solvents, and aggregates. Resins, such as coal tar or asphalt emulsions, bind the mixture together and adhere it to the surface. Solvents help in achieving the correct viscosity for smooth application, while aggregates add texture and increase resistance to wear. Each ingredient plays a pivotal role; for example, coal tar-based sealers can be very durable and enhance resistance to harsh chemicals, though they may come with regulatory . How Sealcoating Combats Weathering and Oxidation Weathering and oxidation are natural processes that cause asphalt surfaces to become brittle and cracked. Sealcoating slows these processes by blocking out oxygen and minimizing the direct contact of UV rays with the asphalt. Research published in the Journal of Materials in Civil Engineering (2020) showed that sealed pavements experienced a 35% slower rate of oxidation compared to unsealed ones, emphasizing its role in prolonging pavement life. The Mechanism of Preventing Water Penetration The sealcoat’s formulation includes hydrophobic compounds that repel water, forming a waterproof layer across the surface. This prevention of water infiltration is crucial in protecting against freeze-thaw damage, as water that freezes inside the pavement expands and causes cracks. Studies indicate that proper sealcoating can reduce water penetration by over 50%, minimizing wear caused by moisture. Enhancing Pavement Flexibility and Durability By maintaining moisture balance and providing a flexible surface, sealcoats help the pavement absorb stress without cracking. They act as a stress absorber, reducing the impact of heavy loads or temperature variations. The sealant maintains the elasticity of the asphalt, ensuring that minor defects do not propagate into larger, costlier repairs. Key Takeaways: – Sealcoating forms a durable barrier that repels water and harmful chemicals. – Specialized ingredients in the sealant enhance adhesion and protect against weathering and oxidation. – Research demonstrates that sealed pavements have a significantly slower degradation rate. – Effective sealcoating reduces water penetration, thereby preventing freeze-thaw damage. – The process preserves pavement flexibility, extending its overall durability. Key Sealcoating Steps for Pavement Preservation Understanding the sequential steps in pavement preservation is essential for achieving optimal results from sealcoating applications. The process involves comprehensive site preparation, meticulous surface repair, and proper application techniques, each contributing to the overall performance and longevity of the seal. Before spray application, a thorough cleaning removes debris, dirt, and previous deteriorated coatings that could interfere with adhesion. Surface preparation is critical since even small amounts of residual contaminants can compromise the sealing effectiveness. Surface Preparation Before Sealant Application Effective sealcoating begins with a detailed surface preparation phase. This involves cleaning, sweeping, or using a broom and sometimes even power washing the pavement to remove loose debris, gravel, and oil residues. It might also include applying a crack filler that smoothens surface irregularities. A properly prepared surface allows the sealant to penetrate and bond with the asphalt, ensuring long-lasting adhesion and a uniform application. Evidence from pavement maintenance studies indicates that surfaces cleaned by professional pressure washing show a 25% increase in sealant retention. Crack Filling and Asphalt Patching Procedures Following thorough cleaning, any visible cracks, potholes, and areas with significant wear are repaired. Asphalt patching is undertaken to fix defects that might otherwise seep water and accelerate

Understanding the Sealcoating Process: What to Expect Read More »

6 Sealcoating Strategies for Homeowners

6 Sealcoating Strategies for Homeowners

Sealcoating is a critical investment in maintaining and enhancing the durability, appearance, and functionality of asphalt surfaces. For homeowners, commercial property managers, and office facilities, choosing the right sealcoating method can be challenging. This article provides an in-depth, comparative analysis of six sealcoating strategies: comparing various methods, evaluating self-sealcoating feasibility, assessing professional advantages, estimating associated costs and risk factors, implementing effective DIY strategies, and selecting the approach that best fits your needs. By understanding each method’s characteristics, benefits, and potential drawbacks, readers will be empowered to protect their investments and prolong the life of pavements. In recent years, sealcoating has become more than just an aesthetic upgrade. It is a scientifically backed maintenance procedure that reduces water damage, prevents oxidation, and minimizes wear from environmental conditions. For instance, studies have shown that properly sealed surfaces can extend a pavement’s functional life by 25% to 50% (American Asphalt Magazine, 2022). Given that asphalt deterioration is accelerated by ultraviolet exposure, water ingress, and the penetration of harmful chemicals such as petroleum products, choosing the correct strategy is essential. In this article, each method is evaluated according to its feasibility, cost, longevity, ease-of-use, and suitability for diverse climates and traffic conditions. Below is a detailed breakdown of each approach to help homeowners make informed decisions about their sealcoating projects. What is Sealcoating and Why Does It Matter? Sealcoating is the process of applying a protective coat—often made of coal tar, petroleum, or emulsion—to an asphalt or concrete surface. This sealcoat acts as a barrier against water, oil, gas, and other substances that can cause damage over time. It also protects against UV rays, which can lead to cracks, fading, and wear. For homeowners, sealcoating is a cost-effective way to maintain their driveway, prevent potholes, and avoid costly driveway repairs. A well-sealcoated driveway not only improves curb appeal but also adds longevity to the surface. Whether you’re dealing with a small crack or preparing for seasonal weather changes like snow or ice, sealcoatin DIY Sealcoating: Taking Matters Into Your Own Hands The Process of DIY Sealcoating DIY sealcoating is a popular choice for homeowners who enjoy do-it-yourself projects and want to save on cost. The process involves several steps, and you’ll need the right tools and materials to get the job done effectively. Asphalt sealcoating is an integral part of this process. Preparation: Start by cleaning the driveway. Use a pressure washing tool or a hose to remove dirt, debris, sand, and gravel. A leaf blower can help clear smaller particles like dust. If there are weeds or grass growing in cracks, remove them with a scraper or weed killer. Repairs: Fill in any potholes or cracks with putty, asphalt patch, or a filler material. You may need a trowel or utility knife to smooth out the surface. Application: Use a squeegee, brush, or spray tool to apply the sealcoat. Products like coal tar or emulsion are commonly available at hardware stores. Apply the coat evenly, ensuring it covers the entire driveway. Drying: Allow the sealcoat to dry for at least 24-48 hours. Keep vehicles, pets, and foot traffic off the driveway during this time to avoid marks or damage. Pros of DIY Sealcoating Cost Savings: One of the biggest advantages of DIY sealcoating is the reduced cost. You’ll only need to purchase materials like sealcoat, a squeegee, and a brush, which are often more affordable than hiring a paving contractor. Control: When you do it yourself, you have full control over the project. You can choose the type of sealcoat, the schedule, and the level of effort you put into cleaning and repairs. Learning Experience: Tackling a DIY project can be a rewarding home improvement experience. You’ll gain skills in maintenance, cleaning, and working with materials like asphalt and concrete. Flexibility: You can work at your own pace, whether you’re sealcoating on a weekend or during a holiday. There’s no need to coordinate with a contractor’s schedule. Cons of DIY Sealcoating Time and Effort: Sealcoating a driveway requires significant time and effort. From pressure washing to applying the sealcoat with a squeegee, the process can be physically demanding, especially if you’re working on a large driveway. Risk of Mistakes: Without proper experience, you might make mistakes, such as applying the sealcoat unevenly or missing spots. This can lead to water seepage, cracks, or a shorter life expectancy for your driveway. Equipment Costs: While you save on labor, you’ll need to invest in tools like a pressure washer, squeegee, brush, and possibly a spray system. These can add up, especially if you don’t already own them. Weather Challenges: DIY sealcoating is weather-dependent. If it rains or there’s high humidity, the sealcoat may not dry properly, leading to streaks or damage. Professional Sealcoating Services: Leaving It to the Experts What Professional Sealcoating Involves Hiring professional services like asphalt companies, paving contractors, or sealcoating services means entrusting your driveway to experts who have the tools, experience, and knowledge to get the job done right. Here’s what the process typically looks like: Inspection: Professionals will inspect your driveway for cracks, potholes, oil stains, and other damage. They’ll determine the best type of sealcoat to use, whether it’s coal tar, emulsion, or a rubberized coat. Preparation: They’ll handle cleaning with industrial-grade pressure washing equipment, removing dirt, debris, and weeds. They may also use a blower to clear dust and sand. Repairs: Professionals will fill cracks and potholes with high-quality filler or asphalt patch, ensuring a smooth surface. They might use a torch to heat and seal the repairs. Application: Using specialized spray equipment or a squeegee, they’ll apply the sealcoat evenly across the driveway. They may add an additive for extra durability or adhesion. Finishing Touches: After the sealcoat dries, they’ll ensure the driveway is ready for vehicles and foot traffic. They might also provide maintenance tips to extend the longevity of the sealcoat. Pros of Professional Sealcoating Expertise: Paving contractors and sealcoating services have years of experience working with asphalt and concrete. They know how to handle challenges like water damage, oil stains, and weather conditions. Quality Results: Professionals use high-quality materials and tools, ensuring a smooth, even coat that enhances curb appeal and protects against wear and tear. Time Savings: Hiring a contractor saves you time and effort. They’ll handle everything from cleaning to repairs, so you don’t have to lift a hammer or shovel. Durability: A professionally applied sealcoat often lasts longer than a DIY job, thanks to the use of additives, proper adhesion, and expert application techniques. Warranty: Many asphalt companies offer a warranty on their work, giving you peace of mind in case of cracks, peeling, or other issues. Cons of Professional Sealcoating Higher Cost: The biggest drawback of hiring professional services is the cost. Depending on the size of your driveway, you might pay a premium for labor, materials, and equipment. Scheduling: You’ll need to coordinate with the contractor’s schedule, which may not always align with yours. Delays due to weather or other projects can be frustrating. Less Control: When you hire a paving contractor, you have less control over the type of sealcoat used or the methods applied. You’ll need to trust their expertise. Potential for Overcharges: Some contractors may upsell unnecessary services or charge extra for repairs like filling potholes or removing oil stains. Comparing Costs: DIY vs. Professional Sealcoating When deciding between DIY and professional services, cost is a major factor. Let’s break it down: DIY Costs: For a medium-sized driveway, you might spend on sealcoat ($50-$100), a squeegee or brush ($20-$40), a pressure washer rental ($50-$100), and filler for cracks ($10-$30). Total: $130-$270. You might also need tools like a utility knife, trowel, or hose, which can add to the budget. Professional Costs: Sealcoating services typically charge per square foot. For a medium-sized driveway, expect to pay $1-$2 per square foot, totaling $500-$1000 or more, depending on repairs and additives. While DIY is cheaper upfront, professional services offer better longevity, potentially saving you money on future driveway repairs. Environmental and Practical Considerations Sealcoating, whether DIY or professional, involves working with materials like coal tar and petroleum, which can have environmental impacts. Coal

6 Sealcoating Strategies for Homeowners Read More »

How Often Should You Sealcoat Your Asphalt

How Often Should You Sealcoat Your Asphalt?

Asphalt surfaces, such as driveways, parking lots, and roads, are critical assets that require regular maintenance to ensure longevity and safety. Sealcoating is a vital preventive maintenance task that protects asphalt from wear and tear, water damage, and ultraviolet (UV) rays. But how often should you sealcoat your asphalt? This comprehensive guide explores the factors influencing sealcoating frequency, the benefits of a proper maintenance schedule, and how to optimize your asphalt’s lifespan. Whether you’re a homeowner, business owner, or facility manager, understanding sealcoating can save costs and enhance aesthetics. What Is Sealcoating and Why Is It Important? Sealcoating involves applying a protective sealant—typically made of bitumen, coal tar, or emulsion—to an asphalt surface. This coat acts as a waterproofing barrier, shielding the asphalt concrete from moisture, oil spills, and UV damage. It also improves adhesion for vehicle tires, enhances curb appeal, and reduces the need for costly repairs like pothole filling or driveway repair. Without sealcoating, asphalt is vulnerable to: Water Damage: Rain and snow penetrate cracks, causing expansion and contraction that leads to potholes. UV Rays: Sunlight breaks down bitumen, making asphalt brittle. Oil and Gasoline: Spills from vehicles degrade the surface. Wear and Tear: Traffic, pedestrian movement, and extreme weather accelerate deterioration. A computerized maintenance management system (CMMS) can streamline scheduling sealcoating as part of a preventive maintenance plan, ensuring timely application and reducing downtime Factors Influencing Sealcoating Frequency The frequency of sealcoating depends on several factors, including climate, traffic volume, and the asphalt’s condition. Here’s a breakdown: 1. Climate and Weather Conditions Asphalt in regions with high humidity, heavy rain, or extreme weather requires more frequent sealcoating. For instance: Rain and Snow: Water seeps into cracks, and snow removal tools like plows can scrape the surface. Heat and UV Rays: Temperatures above 90°Fahrenheit accelerate bitumen breakdown. Freeze-Thaw Cycles: Ice formation in cracks expands asphalt, causing damage. In harsh climates, sealcoating every 2–3 years is recommended to prevent water damage and maintain the road surface. 2. Traffic Volume High-traffic areas, such as commercial asphalt paving lots or runways, experience more tire wear and stress. Heavy vehicles, like trucks, increase the workload on the asphalt, necessitating sealcoating every 1–2 years. In contrast, a residential driveway with minimal vehicle traffic may only need sealcoating every 3–5 years. 3. Asphalt Age and Condition New asphalt should be sealcoated within 6–12 months of installation to protect the fresh bitumen. Older surfaces with visible cracks, fading, or potholes may require driveway repair or parking lot repair before sealcoating. Regular inspections using a checklist can help technicians identify when to apply sealant. 4. Maintenance History A well-maintained asphalt surface with a consistent preventive maintenance schedule lasts longer. Facilities using CMMS software for maintenance planning can track mean time between failures (MTBF) and mean time to repair (MTTR), optimizing resource allocation and reducing costs. Neglected surfaces may need more frequent sealcoating to address accumulated damage. Understanding Sealcoating Frequency – Fundamental Concepts Explored Sealcoating frequency improves the longevity of asphalt by protecting the pavement from environmental hazards and heavy traffic wear, which contribute to oxidation and deterioration. Studies estimate that properly maintained sealcoated surfaces can experience up to a 50% reduction in cracking over a decade (Journal of Transportation Research, 2021). Husky Asphalt Paving provides high-quality sealcoating solutions, ensuring that each layer forms a protective barrier against harmful UV rays, temperature fluctuations, chemical spills, and the adhesion of deleterious debris such as coal tar and sand. Asphalt is a renewable asset when maintained appropriately; an optimal sealcoating schedule—generally every two to three years—has been shown to preserve pavement integrity and improve overall equipment effectiveness. Additionally, sealants address common issues like water damage and oil spill penetration by reducing adhesion of pollutants, which diminishes degradation. For example, suburban parking lots treated with Husky’s premium sealants have maintained near-original appearance even after repeated exposure to heavy vehicular traffic and extreme weather conditions. High-frequency applications are often unnecessary if a maintenance schedule is diligently followed. Instead, property owners benefit from a balanced approach that factors in climate, traffic load, and prior wear patterns. In regions with intense sunlight and variable humidity, such as Florida or Texas, a slightly accelerated maintenance plan is recommended to counteract the aggressive environmental impacts on asphalt. When to Reapply Sealcoat on Asphalt – Timing and Signs Reapplying sealcoat on asphalt enhances protection by restoring the pavement’s barrier, and the optimal timing is determined by recognizing visible signs, such as fading, cracking, and increased oxidation. Industry research suggests that reapplication every two to three years is ideal, though certain high-traffic areas might benefit from annual touch-ups. Husky Asphalt Paving emphasizes that signs like chalking (a powdery residue) indicate that the sealant’s adhesion is weakening. Visual inspection is the first indication: if weathering leads to water penetration or oil stains become more resistant to routine cleaning, it is time to consider reapplication. Laboratory tests conducted by the Asphalt Institute in 2019 revealed that asphalt samples with diminished sealant integrity showed a 27% increase in surface deterioration compared to freshly treated surfaces. Therefore, timely reapplication protects the inherent adhesive properties of the asphalt and prolongs its service life. Furthermore, environmental factors such as ultraviolet (UV) exposure, extreme temperature swings, and chemical load determine the exact interval for reapplication. For example, a commercial parking lot experiencing heavy chemical spills may require more frequent treatments in comparison to a low-traffic suburban driveway. To summarize, the decision to reapply sealcoat should always be based on consistent evaluations of pavement condition using both visual and laboratory assessments. Developing a Maintenance Schedule for Asphalt Surfaces – Strategic Planning Developing a maintenance schedule for asphalt surfaces improves overall asset management by integrating regular inspections and timely reapplications, ensuring that the pavement remains intact and resilient. A strategic maintenance plan involves scheduled assessments, recorded observations of crack patterns, and planned sealcoating treatments, ideally every two to three years for most properties. Husky Asphalt Paving recommends scheduling maintenance tasks based on environmental conditions and usage data. For instance, preparation for winter may include cleaning

How Often Should You Sealcoat Your Asphalt? Read More »

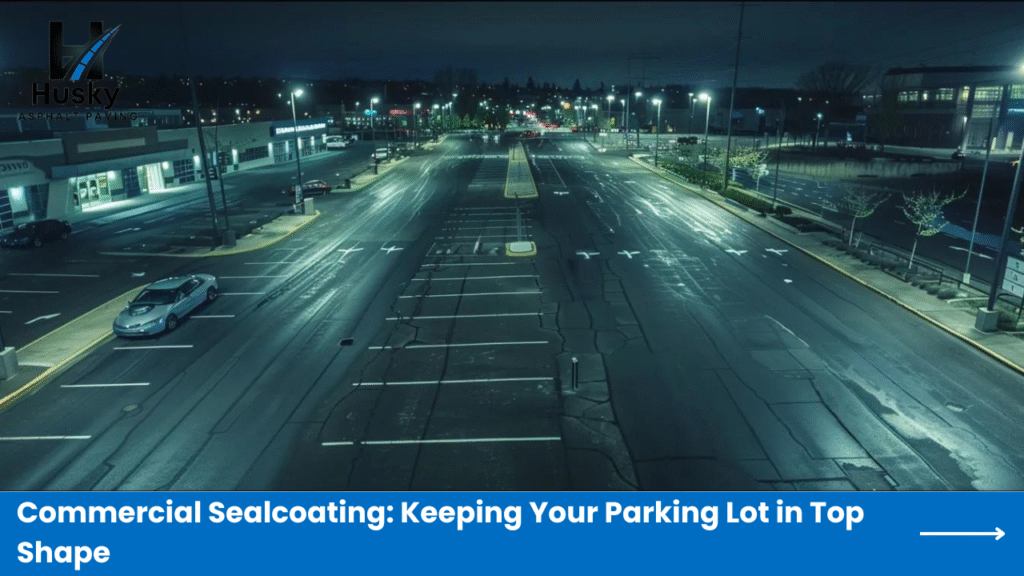
Commercial Sealcoating Keeping Your Parking Lot in Top Shape

Commercial Sealcoating: Keeping Your Parking Lot in Top Shape

When it comes to maintaining a commercial property, the parking lot often gets overlooked. Yet, it’s one of the first things your customers, employees, and visitors notice. A well-maintained parking lot not only enhances the curb appeal of your business but also ensures safety and longevity. This is where commercial sealcoating comes into play—a cost-effective solution to protect your asphalt investment. In this comprehensive guide, we’ll explore the ins and outs of sealcoating, its benefits, the process, and how it can keep your parking lot in top shape. What is Commercial Sealcoating? Sealcoating is the process of applying a protective layer, often made from coal tar, petroleum emulsion, or asphalt-based materials, to an asphalt surface. This protective coating acts as a barrier against elements like water, oil, UV rays, and wear and tear, which can degrade the pavement over time. For businesses, sealcoating is a critical part of parking lot maintenance, ensuring the surface remains smooth, durable, and visually appealing. Sealcoating isn’t just about aesthetics—it’s a proactive measure to extend the lifespan of your asphalt pavement. By preventing issues like cracks, potholes, and corrosion, it saves you from costly repairs down the road. Whether you manage a warehouse, retail space, or office building, investing in sealcoating can significantly reduce long-term expenses. The Importance of Sealcoating for Commercial Properties A parking lot is more than just a place to park—it’s an asset that reflects your business’s professionalism. A cracked, faded, or uneven parking lot can create a poor first impression, potentially driving away potential customers. On the other hand, a well-maintained parking lot enhances your curb appeal, improves safety, and ensures environmentally friendly practices by reducing runoff and erosion. Key Benefits of Commercial Sealcoating Protection Against Elements Asphalt is vulnerable to water, snow, ice, and storm drain runoff, which can seep into cracks and cause potholes or crack repair needs. Sealcoating creates a waterproof barrier, preventing rain and snow removal challenges from damaging the surface. Resistance to Wear and Tear Daily traffic, heavy vehicles like trucks and trailers, and even pedestrian activity can cause wear and tear on your parking lot. Sealcoating protects against this by adding a durable layer that withstands pressure and friction. UV Protection The sun’s ultraviolet rays can cause asphalt to fade and become brittle over time. Sealcoating shields the pavement from infrared and UV damage, preserving its flexibility and appearance. Cost Savings Regular sealcoating is a fraction of the price of full asphalt repairs or repaving. It’s an investment that pays off by delaying the need for expensive construction or paving services. Enhanced Safety A smooth, sealed surface reduces the risk of trips and falls, improves traction for vehicles, and ensures clear stencil markings for parking spaces, cart areas, and traffic flow. This is especially important for businesses in regions like Georgia, Wisconsin, or areas with harsh weather conditions. Environmental Benefits Sealcoating helps manage debris and prevents oil spills from penetrating the asphalt, reducing the environmental impact. It also supports stormwater management by minimizing runoff into drainage systems.The Sealcoating Process: What to Expect The Sealcoating Process: What to Expect The sealcoating process is straightforward but requires professional expertise to ensure optimal results. Here’s a step-by-step breakdown of what J & J Sealcoating or other asphalt sealing companies typically do: 1. Surface Preparation Before applying the sealant, the parking lot must be thoroughly cleaned. This involves removing debris, dirt, and oil stains using a blower, squeegee, or brush. Any cracks or potholes are filled with crack filler to create a smooth surface. 2. Application of Sealant The sealant, often a coal tar emulsion or petroleum-based product, is applied using a spray or squeegee method. Professionals ensure even coverage across the driveway, sidewalk, or parking lot, paying attention to high-traffic areas. 3. Curing and Drying After application, the sealant needs time to cure—typically 24 to 48 hours. During this period, the parking lot should be closed to traffic and pedestrians to avoid damage. Weather conditions, such as heat or humidity, can affect drying time. 4. Final Touches Once the sealant has dried, professionals may apply stencil markings for parking lot striping, ensuring clear parking spaces and traffic flow. This step enhances both safety and organization. 5. Post-Application Inspection A thorough inspection ensures the sealant has adhered properly and there are no missed spots. This step is crucial for quality assurance and long-term durability.Factors to Consider Before Sealcoating Factors to Consider Before Sealcoating Before hiring a local sealcoating company, there are several factors to keep in mind: Age of the Pavement: Sealcoating is most effective on asphalt that’s 3-6 months old or has been recently repaved. Older pavements may require asphalt repairs or crack repair first. Weather Conditions: Sealcoating should be done in dry, warm weather—ideally between 50°F and 85°F. Rain, snow, or ice can interfere with the curing process. Traffic Volume: High-traffic areas like warehouses, condominiums, or commercial paving projects may need more frequent sealcoating to combat wear and tear. Budget: While sealcoating is cost-effective, the price can vary based on the size of the lot, the type of sealant, and additional services like parking lot repairs or paving. How Often Should You Sealcoat Your Parking Lot? The frequency of sealcoating depends on several factors, including traffic, weather, and the condition of the pavement. As a general rule: New Asphalt: Sealcoat within 6-12 months of installation to protect the surface from the start. Moderate Traffic Areas: Sealcoat every 2-3 years to maintain durability. High-Traffic Areas: For parking lots near businesses, warehouses, or retail spaces, sealcoating every 1-2 years is recommended. Regular maintenance, such as sweeping and crack repair, can also extend the time between sealcoating applications. Partnering with asphalt sealing companies for preventative maintenance ensures your parking lot stays in top shape. Choosing the Right Sealcoating Company Selecting the right asphalt sealing company is crucial for a successful project. Here are some tips to guide your decision: Experience: Look for a company with a proven track record in commercial paving services. J & J Sealcoating, for example, is known for its expertise in asphalt paving and sealcoating. Reputation: Check reviews, ask for references, and look for companies with a strong reputation in your area—whether in Georgia, Wisconsin, or elsewhere. Services Offered: Ensure the company provides comprehensive services, including crack repair, parking lot striping, and asphalt maintenance. Free Quote: Reputable companies offer a free quote or estimate to help you plan your budget. Customer Service: Choose a company that prioritizes communication, transparency, and organization. They should provide clear information on the process, timeline, and cost. Sealcoating as Part of a Broader Maintenance Strategy Sealcoating is just one piece of the puzzle when it comes to parking lot maintenance. To maximize the lifespan of your pavement, consider integrating it into a broader maintenance plan: Regular Inspections: Schedule routine inspections to identify issues like cracks, potholes, or drainage problems early. Asphalt Repairs: Address crack repair, pothole filling, and asphalt paving needs promptly to prevent further damage. Snow Removal: In colder climates, invest in professional snow removal to protect the pavement from ice and pressure. Parking Lot Striping: Refresh parking lot striping regularly to maintain clear parking spaces and improve traffic flow. Route Optimization: For large lots, optimize routes for vehicles and pedestrians to reduce wear and tear. The Role of Sealcoating in Business Growth A well-maintained parking lot can directly impact your business. It’s an investment that enhances curb appeal, attracts potential customers, and improves safety for employees and visitors. Additionally, it can contribute to your marketing

Commercial Sealcoating: Keeping Your Parking Lot in Top Shape Read More »

Residential Sealcoating: Protecting Your Driveway

Residential Sealcoating: Protecting Your Driveway

Is your asphalt driveway losing its dark sheen and showing early wear? Over time, UV rays, moisture, petroleum stains, and freeze–thaw cycles degrade asphalt surfaces. This guide covers every aspect of residential sealcoating—from benefits and sealant selection to DIY vs. professional application and post‑sealcoat upkeep. Learn how Husky Asphalt Paving’s specialized sealcoating services can extend your pavement’s life and enhance curb appeal. Key Takeaways Sealcoat your driveway every two to three years for maximum pavement life. Choose polymer‑modified emulsion for best UV and abrasion protection. Proper surface prep and crack sealing ensure a uniform, long‑lasting coat. Professional application includes warranty and high‑capacity equipment benefits. Regular post‑sealcoat inspections and gentle cleaning preserve the protective layer. What does residential sealcoating achieve for your driveway? Residential sealcoating restores the original color, fills micro‑pores, and creates a protective layer that resists water penetration, petroleum spills, and UV oxidation. By applying an asphalt emulsion sealer, homeowners can reduce surface abrasion by up to 70%, according to the National Asphalt Pavement Association (2021). This barrier also slows oxidation, preventing cracks and potholes from expanding over time. Sealcoating replenishes fine oils lost to sun and rain, restoring flexibility to an asphalt driveway. When Husky Asphalt Paving applies its proprietary hot‑applied mastic sealant, pavement maintenance intervals can extend from two to four years, depending on climate and traffic load. This protective coat also repels deicing salts, reducing corrosion along edges and expansion joints. Enhance pavement with Husky Asphalt Paving’s sealcoating to lock in moisture resistance and maintain a uniform surface texture. Regular sealing prevents root intrusion beneath cracks and minimizes erosion along gravel perimeters. The result is a driveway that looks new longer and carries a manufacturer’s warranty against peeling and flaking for up to 24 months. The next section will help you spot early warning signs that your driveway needs preventive sealcoating. What are the signs that your driveway needs home sealcoating? Cracks, fading color, and surface pitting signal that sealcoating is overdue. When asphalt turns light gray or exhibits spiderweb patterns, UV‑induced oxidation has dried out binder oils. Husky Asphalt Paving recommends resealing before micro‑cracks widen beyond 1/8 inch to avoid deeper base damage. Pooling water on depressions, sand‑like grit on the surface, and oil stains absorbing into asphalt all point to weakened pavement. In climates like Minnesota’s freeze–thaw cycle, moisture trapped in cracks expands, leading to spalling. Early resealing can prevent potholes and save up to 40% in full overlay costs. Additional red flags include edge deterioration near grass and block paving driveways, surface flaking after snowplow use, and frequent need for cold patch asphalt repair. Homeowners who avoid these warning signs often face more extensive driveway pavement repair later. Recognizing these issues early allows Husky Asphalt Paving to schedule timely maintenance. Up next, discover the core benefits of routine driveway maintenance via sealcoating. What are the key benefits of regular driveway maintenance through sealing? Consistent sealcoating dramatically improves pavement longevity, surface safety, and aesthetic appeal. By preventing water ingress and binder oxidation, a single coat can extend a driveway’s service life by up to 50%. This translates into fewer potholes, reduced erosion, and minimal need for patching. Regular sealing also enhances traction by filling minor voids, making driving safer in wet or icy conditions. Husky Asphalt Paving’s seal coat includes traction‑enhancing additives that meet American Association of State Highway and Transportation Officials (AASHTO) guidelines for skid resistance. Financially, resealing reduces overall driveway maintenance costs by lowering the frequency of crack sealing, pothole repair, and full resurfacing. Homeowners report saving $500–$1,200 over a ten‑year span when comparing routine sealcoating versus reactive repairs. Visually, sealcoated driveways boost curb appeal, which can raise property value by as much as 5%, according to the Appraisal Institute. Learn how to choose the ideal sealant formulation for your specific asphalt care needs in the following section. How do you select the right sealant for your residential asphalt? Choosing between asphalt-based, coal tar emulsion, and polymer-modified sealants depends on traffic load, climate, and environmental regulations. Asphalt emulsions suit light‑traffic residential driveways, while coal tar formulas offer superior oil‑resistance for driveways exposed to gasoline leaks. Polymer-enhanced sealers deliver longer wear and enhanced UV protection in high‑sun regions. Husky Asphalt Paving uses an environmentally friendly polymer blend that meets Pennsylvania Department of Environmental Protection (PA DEP) VOC limits. This proprietary emulsion provides a 0.10‑inch thick coat per application, covering 100–120 square feet per gallon. The company’s crack‑bridging formula also resists tree root intrusion at expansion joints. When ordering a free estimate, homeowners should consider coverage rates, dry‑time (typically 24–48 hours), and recoat windows (usually 1–3 hours between coats). For driveways in freezing climates, a sealer with liquid anti‑freeze additives extends the application season into early spring and late fall. Refer to the comparison table below for a quick overview of Husky Asphalt Paving’s most popular sealant options. Below is a detailed comparison table summarizing key attributes of sealant types offered by Husky Asphalt Paving. Sealant Type Primary Composition Coverage (ft²/gal) Recommended Recoat Interval Key Benefit Polymer-Modified Emulsion Asphalt + Styrene-Butadiene 100–120 2–3 hours Enhanced UV & abrasion resistance Coal Tar Emulsion Coal tar + emulsifier 90–110 3–4 hours Superior oil and gasoline repellent Asphalt Emulsion Asphalt binder + water 110–130 1–2 hours Eco‑friendly, low VOC Hot-Applied Mastic Rubberized asphalt 80–100 N/A (single coat) Crack filling & high durability This table highlights how Husky Asphalt Paving’s sealants differ in composition, coverage, and performance. Selecting the right option ensures optimal protection against moisture, petroleum, and UV degradation. Next, see how to prepare your driveway surface for a flawless sealcoat application. How do you prepare your driveway for optimal sealcoating results? Surface preparation begins with pressure washing to remove dirt, oil, and vegetation. A clean surface allows sealant to bond directly to aggregate and binder, preventing early peeling. Husky Asphalt Paving uses 3,000‑psi hot‑water washers to clear residual salts and algae. After drying for 24 hours, technicians perform crack sealing using asphalt crack filler or hot‑applied mastic. Filling cracks wider than 1/8 inch and sealing

Residential Sealcoating: Protecting Your Driveway Read More »

The Best Time of Year to Asphalt Sealcoat in Riverside

The Best Time of Year to Asphalt Sealcoat in Riverside

When is the best time to sealcoat your asphalt in Riverside? This guide explores how Riverside’s climate affects sealcoating success and outlines the ideal seasons for this important maintenance task. You’ll learn the temperature requirements for effective sealcoating, why spring and fall are optimal times, and the challenges of summer and winter applications. By understanding the best timing and preparation steps, you can maximize your pavement’s longevity and protect your investment. Key Takeaways Riverside’s climate significantly impacts sealcoating success, with temperature and humidity affecting application and curing Spring and fall offer optimal conditions for sealcoating in Riverside, with moderate temperatures and reduced rainfall Proper asphalt preparation, including cleaning and repairs, is crucial for successful sealcoating projects Selecting experienced professionals and booking services in advance ensures optimal sealcoating results in peak seasons Well-timed sealcoating applications can significantly extend asphalt lifespan and reduce long-term maintenance costs in Riverside How Riverside’s Climate Affects Sealcoating Success Riverside’s climate plays a crucial role in sealcoating success. The city’s typical weather patterns, including sunshine and humidity levels, significantly impact sealcoat curing. Timing projects to avoid rainy seasons and considering microclimates within Riverside are essential for optimal results. Understanding these factors helps minimize wear and tear on asphalt surfaces and ensures proper sealer application, even in areas prone to fog or cloud cover. Typical Weather Patterns Throughout the Year in Riverside Riverside experiences hot, dry summers and mild winters, with low humidity levels throughout the year. The city’s climate impacts sealcoating projects, requiring attention to temperature and moisture conditions. Contractors must consider the optimal time for application, avoiding excessive heat or potential rain that could affect the sidewalk and surrounding areas. Personal protective equipment is essential for workers dealing with high temperatures and potential exposure to dirt and sealcoating materials. Season Temperature Humidity Sealcoating Conditions Summer Hot (90-100°F) Low Challenging due to heat Winter Mild (60-70°F) Low to Moderate Favorable Spring/Fall Moderate (70-80°F) Low to Moderate Ideal The Role of Sunshine and Humidity in Sealcoat Curing Sunshine and humidity significantly influence sealcoat curing in Riverside. The city’s abundant sunlight accelerates the drying process, allowing for quicker project completion on roads and concrete surfaces. Low humidity levels typical of Riverside’s climate contribute to faster evaporation, reducing the risk of moisture-related issues like potholes. However, contractors must carefully time applications to avoid excessive heat, which can cause the sealcoat to dry too rapidly and potentially crack. Optimal curing conditions balance sunshine exposure with moderate temperatures, ensuring proper adhesion and longevity of the sealcoat paint: Sunlight: Accelerates drying process Low humidity: Promotes faster evaporation Temperature control: Prevents rapid drying and cracking Timing: Crucial for optimal curing and adhesion Precipitation awareness: Avoids moisture-related complications Avoiding Riverside’s Rainy Seasons for Sealcoating Projects Contractors in Riverside must carefully plan sealcoating projects to avoid the rainy season, typically occurring from November to April. Scheduling work during drier months ensures optimal sunlight exposure and proper drainage, enhancing the longevity of the sealcoat. By avoiding precipitation, professionals can maintain the integrity of curbs and prevent water-related issues that could compromise the quality of the application. Strategic timing of sealcoating projects in Riverside’s climate involves: Monitoring weather forecasts for dry periods Scheduling projects during summer and early fall Ensuring adequate curing time before potential rain Protecting newly sealed surfaces from unexpected showers Adjusting project timelines to accommodate Riverside’s climate patterns Microclimate Considerations Within the Riverside Area Riverside’s varied topography creates microclimates that impact sealcoating effectiveness. Higher elevations may experience cooler temperatures, affecting curing times for parking lot paving projects. Low-lying areas near water bodies can have increased humidity, potentially slowing the drying process and risking dehydration for workers. Contractors must account for these local climate variations to optimize sealcoating results and protect their investment. Understanding microclimates helps prevent issues like premature cracking or ice formation in winter, ensuring long-lasting asphalt protection across diverse Riverside landscapes. Temperature Requirements for Successful Asphalt Sealcoating Successful asphalt sealcoating in Riverside requires precise temperature conditions for optimal results. This section explores minimum application temperatures, the importance of ground temperature, ideal temperature windows for adhesion and drying, risks of extreme temperatures, and the necessity of checking forecasts. Understanding these factors ensures proper binder application, enhances maintenance effectiveness, and supports long-term pavement health, ultimately improving customer service and project outcomes. The Minimum Temperature for Sealcoat Application Successful sealcoat application in Riverside requires a minimum temperature of 50°F (10°C) for both air and road surface. This threshold ensures proper adhesion and curing of sealers, minimizing the risk of moisture-related issues and premature wear. Contractors must carefully monitor temperatures to achieve optimal results, as applying sealcoat below this minimum can lead to poor bonding and reduced effectiveness in protecting the asphalt surface: Temperature Range Sealcoat Application Suitability Below 50°F (10°C) Not suitable, poor adhesion 50°F – 70°F (10°C – 21°C) Acceptable, slower curing 70°F – 90°F (21°C – 32°C) Ideal, optimal adhesion and curing Above 90°F (32°C) Challenging, rapid drying may occur Why Ground Temperature Matters as Much as Air Temperature Ground temperature plays a crucial role in successful asphalt sealcoating, matching the importance of air temperature. Asphalt companies in Riverside monitor both air and ground temperatures to ensure optimal application conditions. The ground temperature affects the sealant’s ability to penetrate and bond with the asphalt surface, impacting its durability and resistance to salt, tire wear, and environmental factors. Cloud cover can influence ground temperature, so contractors must account for this when scheduling projects. The volume of traffic on the pavement also affects ground temperature, requiring careful consideration in high-use areas: Monitor air and ground temperatures Consider cloud cover effects Assess traffic volume impact Ensure proper sealant penetration Optimize durability against salt and tire wear Optimal Temperature Windows for Sealant Adhesion and Drying The optimal temperature window for sealant adhesion and drying in Riverside typically ranges from 70°F to 90°F (21°C to 32°C). Within this range, the sealant achieves ideal viscosity for even application by pavers, allowing proper penetration into the asphalt surface without excessive evaporation. This temperature range also promotes uniform drying, reducing the risk of staining or uneven curing.

The Best Time of Year to Asphalt Sealcoat in Riverside Read More »

Why Sealcoating Is Key to Protecting Asphalt and Extending Pavement Life

Why Sealcoating Is Key to Protecting Asphalt and Extending Pavement Life

Asphalt surfaces face constant wear from weather and traffic. Sealcoating is a vital protective measure for extending pavement life. This article explores the importance of sealcoating, its key benefits, and best practices for application. We’ll debunk common myths and help you determine when to sealcoat your pavement. By understanding sealcoating, you can better protect your asphalt investment and avoid costly repairs. Key Takeaways Sealcoating protects asphalt from weather, traffic, and chemicals, extending pavement life and reducing maintenance costs Regular sealcoating prevents cracks, potholes, and water damage, improving aesthetics and durability of asphalt surfaces Proper timing and thorough preparation are crucial for effective sealcoating application and optimal results Sealcoating differs from resurfacing and offers long-term value despite initial costs Experts recommend sealcoating every 2-3 years, adjusting frequency based on traffic and climate conditions Understanding the Importance of Sealcoating Sealcoating is a crucial process that protects asphalt surfaces from damage caused by weather, traffic, and chemicals. It forms a protective layer that prevents water, motor oil, and other substances from penetrating the pavement, ensuring better adhesion and longevity. Regular application of sealcoat can significantly extend the life of pavement, reducing the need for costly repairs and replacements. This process is especially important for areas with high traffic or exposure to harsh elements, as it helps maintain the surface’s integrity and appearance. Proper sealcoating techniques involve thorough cleaning of the surface, often using a broom or specialized equipment, and applying the sealant evenly. Some contractors may use plywood boards to ensure smooth application. By investing in sealcoating, property owners can protect their asphalt investments and manage their maintenance budget more effectively. Key Benefits of Sealcoating for Asphalt Longevity Sealcoating offers crucial benefits for asphalt longevity, including enhanced protection against weather damage, prevention of cracks and potholes, and improved aesthetic appeal. This waterproofing technique shields commercial pavements from harsh elements, extending their lifespan and reducing maintenance costs. By applying a coal-based sealant, property owners can effectively safeguard their investments and maintain attractive, durable surfaces. Enhanced Protection Against Weather Damage Sealcoating provides enhanced protection against weather damage, shielding asphalt parking areas from the harmful effects of water, UV rays, and temperature fluctuations. The emulsion creates a waterproof barrier that prevents water damage, reducing the risk of cracks and potholes caused by freeze-thaw cycles. This protective layer also minimizes tire wear and extends the life of the pavement. Property owners can request a free estimate to determine the best sealcoating solution for their specific needs: Prevents water infiltration Protects against UV radiation Reduces damage from temperature changes Minimizes tire wear on asphalt surfaces Authority on Preventing Cracks and Potholes Sealcoating serves as a powerful defense against cracks and potholes, preserving the integrity of asphalt surfaces. The Federal Highway Administration recognizes sealcoating as a valuable investment in pavement preservation, protecting against sunlight damage and water infiltration. By applying a high-quality sealer, property owners can significantly reduce the need for costly repairs and extend the life of their asphalt surfaces. Advancing the Aesthetic Appeal of Your Pavement Sealcoating enhances the aesthetic appeal of asphalt surfaces, transforming worn pavement into a sleek, uniform appearance. This process not only protects concrete and asphalt from petroleum-based products but also creates a smooth surface that complements surrounding pavers. Property owners can easily maintain their newly sealed surfaces by addressing root issues promptly and contacting professionals via email for regular maintenance schedules. How Sealcoating Extends the Life of Asphalt Surfaces Sealcoating plays a vital role in extending asphalt life through temperature regulation and protection against spills. This pavement maintenance technique creates a barrier that shields the surface from herbicides, oil, gas, and other chemicals. By applying a filler-rich sealant, property owners can preserve their gravel and asphalt investments, reducing long-term maintenance costs and enhancing durability. The Role of Sealcoating in Temperature Regulation Sealcoating acts as a thermal regulator for asphalt surfaces, protecting them from extreme temperature fluctuations. The dark sealant absorbs heat during warm periods, preventing excessive expansion of the road surface, while also shielding against moisture penetration during colder months. This temperature regulation helps maintain the integrity of the pavement, reducing the formation of cracks and debris that can lead to more severe damage. Proper application using a squeegee ensures even coverage, extending protection to adjacent areas such as lawns and preventing moisture-related issues. Shielding Against Oil, Gas, and Chemical Spills Sealcoating provides a protective barrier against oil, gas, and chemical spills, shielding asphalt from wear and tear. This layer prevents these substances from penetrating and staining the pavement, maintaining its appearance and accessibility. By reducing heat absorption, sealcoating also helps preserve the asphalt’s structural integrity, extending its lifespan and minimizing maintenance costs. Best Practices for Sealcoating Application Effective sealcoating application requires careful timing and thorough preparation. Proper timing ensures optimal adhesion and durability of the seal coat, while preparation safeguards against subgrade issues. This section explores the best practices for applying sealcoat, including considerations for weather conditions, oil stains, and coal tar alternatives. Understanding these techniques helps maximize pavement protection and longevity. Timing Your Sealcoating for Optimal Results Timing sealcoating application is crucial for optimal results in asphalt maintenance. Contractors use specialized machines and trucks to apply sealant during favorable weather conditions, typically when temperatures are above 50°F and no rain is forecast for 24 hours. This timing ensures proper curing and adhesion, extending the pavement’s life cycle. Proper timing also allows for addressing any joint issues before application, ensuring a seamless protective layer. Preparing Your Asphalt Before Sealcoating Proper preparation of asphalt surfaces is crucial before sealcoating to ensure optimal adhesion and longevity. Contractors must thoroughly clean the surface, removing debris, oil stains, and any signs of alligator cracking. For stubborn stains caused by diesel fuel or other contaminants, specialized cleaning agents may be necessary. The bitumen binder in the asphalt should be inspected for signs of deterioration, and any damaged areas should be repaired before applying the sealcoat. Property owners can contact professionals at [email protected] for expert guidance on preparing their asphalt surfaces effectively: Step Action Purpose 1 Clean

Why Sealcoating Is Key to Protecting Asphalt and Extending Pavement Life Read More »

Resurfacing vs. Full Replacement: Key Considerations for Asphalt Paving Decisions

Are you facing the dilemma of whether to resurface or fully replace your asphalt pavement? This guide examines the key factors to consider when making this important decision. We’ll explore the differences between resurfacing and full replacement, discuss cost-effective solutions, and provide maintenance tips. By the end, you’ll have the knowledge to make an informed choice that best suits your paving needs. Key Takeaways Asphalt resurfacing offers a cost-effective solution for maintaining parking lots and roadways Full asphalt replacement addresses severe damage and structural issues that resurfacing cannot fix Proper maintenance is crucial for maximizing the lifespan of resurfaced or replaced asphalt Seeking professional advice is important when deciding between asphalt resurfacing and full replacement Obtaining multiple quotes helps property owners make informed decisions about their paving projects Understanding Asphalt Resurfacing Asphalt resurfacing offers a cost-effective solution for maintaining parking lots and roadways. This process involves applying a new layer of asphalt over existing pavement, enhancing its appearance and durability. Understanding the benefits, common misconceptions, and proper techniques of resurfacing is crucial for making informed decisions about asphalt maintenance. Proper resurfacing can extend the life of a parking lot network, reduce the need for frequent repairs, and improve overall appeal. What Is Asphalt Resurfacing? Asphalt resurfacing is a cost-effective maintenance technique that involves applying a new layer of asphalt over existing pavement. This process rejuvenates the surface, addressing minor imperfections and extending the lifespan of the pavement. Resurfacing not only improves the aesthetic appeal but also enhances the functionality of parking lots and roadways. The new layer provides better traction, smoother surfaces, and improved resistance to environmental factors. Here are the key aspects of asphalt resurfacing: Surface preparation and cleaning Application of tack coat for adhesion Laying of new asphalt layer Compaction for durability Finishing touches and line marking Key Benefits of Choosing Asphalt Resurfacing Asphalt resurfacing offers numerous benefits for property owners and paving contractors alike. This cost-effective solution extends the life of existing pavements while improving their appearance and functionality. By recycling the existing asphalt, resurfacing reduces waste and environmental impact. It also creates a smoother surface, minimizing dust and enhancing the overall driving experience. For driveway paving projects, resurfacing provides a quick and efficient option that can be completed with minimal disruption: Benefit Description Cost-effective Less expensive than full replacement Time-efficient Quicker installation process Environmentally friendly Recycles existing materials Improved aesthetics Refreshes appearance of pavement Enhanced durability Extends lifespan of existing surface Common Misconceptions About Asphalt Resurfacing Asphalt resurfacing often faces misconceptions regarding its effectiveness and longevity. Some assume it’s merely a temporary fix, but when properly executed, resurfacing can extend pavement life significantly. Another common misunderstanding is that resurfacing works for all types of damage, including severe structural issues. In reality, while resurfacing effectively addresses surface-level problems, it may not be suitable for pavements with extensive underlying damage or those requiring concrete slab replacement. Additionally, people sometimes confuse resurfacing with simply adding a layer of sand or changing the color of the pavement, when in fact, it involves applying a new layer of asphalt material to enhance the paving’s durability and appearance. Recognizing the Full Replacement of Asphalt Full asphalt replacement involves removing the entire existing pavement and installing a new surface. This process addresses severe damage, structural issues, and deterioration that resurfacing cannot fix. Unlike partial repairs, full replacement provides a complete solution, eliminating problems like extensive cracking, chewing, and dirt infiltration. Understanding when replacement is necessary and its advantages is crucial for making informed paving decisions. Defining Full Asphalt Replacement Full asphalt replacement involves removing the entire existing pavement down to its root and installing a new surface. This comprehensive process addresses severe wear and tear that simple asphalt resurfacing cannot fix. Contractors often recommend full replacement when asphalt parking lot repair near me searches reveal extensive damage. Unlike partial solutions or advertisements for quick fixes, full replacement provides a long-lasting solution to structural issues: Aspect Full Replacement Resurfacing Depth of Work Complete removal and rebuild Surface layer only Duration Longer process Quicker turnaround Cost Higher initial investment More cost-effective short-term Longevity Extended lifespan Temporary improvement Advantages of Full Asphalt Replacement Full asphalt replacement offers several advantages over resurfacing, particularly for severely damaged surfaces. It provides a completely new foundation, eliminating underlying issues and ensuring long-term durability. This method allows for proper grading and drainage, reducing the risk of water accumulation and subsequent damage. Full replacement also presents an opportunity to upgrade the paving design, incorporating features like reinforced edges or improved load-bearing capacity to accommodate heavy equipment or high traffic areas. For families considering a new patio or driveway, full replacement ensures a smooth, debris-free surface that enhances both the functionality and aesthetic appeal of their outdoor spaces. Situations That Necessitate Full Replacement Full asphalt replacement becomes necessary when the existing pavement has suffered extensive damage or deterioration beyond the scope of resurfacing. This typically occurs when the base layer is compromised, multiple deep cracks have formed, or severe potholes have developed. Professionals consider factors such as maintenance requirements, cost, and long-term durability when recommending full replacement over other options. Property owners should seek a free estimate to assess whether their asphalt surface requires complete renewal, especially if they’re considering alternatives like concrete pavers. Unlike natural teeth, asphalt doesn’t regenerate, making timely replacement crucial for maintaining safe and functional surfaces. Situations that often call for full replacement include: Extensive alligator cracking covering large areas Significant drainage issues causing water pooling Severe rutting or depressions in the pavement Age-related deterioration beyond 20-25 years Multiple unsuccessful repair attempts Comparing Resurfacing and Full Replacement Comparing resurfacing and full replacement is crucial for making informed asphalt paving decisions. This section examines cost differences, longevity, and performance impacts of each option. Understanding these factors helps property owners choose between patching, pavement resurfacing, or complete replacement. Considerations include asphalt resurfacing costs, the effectiveness of sealcoat applications, and long-term maintenance requirements for optimal pavement performance. Cost Differences Between Resurfacing and Full Replacement Cost differences between resurfacing and full replacement significantly impact asphalt paving decisions.

Resurfacing vs. Full Replacement: Key Considerations for Asphalt Paving Decisions Read More »